Jewelry Studio Manager Training Centre

Start with a short product tour, then follow the learning path for your role. Every example uses fictional demonstration data.

Training video library

Learn one practical outcome at a time. Start with the two-minute overview, then follow the first-time path or jump directly to the task you need.

Product overview

From enquiry to delivery in two minutes

Outcome: understand how clients, commissions, consultations, approvals, invoicing and reporting fit into one studio workflow.

Watch directly on YouTube
Start here

New to studio software?

Outcome: learn a calm, low-risk way to begin with fictional practice records before inviting your team or entering real client data.

Watch directly on YouTube
Clients

Add a client and record useful preferences

Outcome: create a focused client record, store relevant jewelry preferences and avoid duplicate or excessive personal data.

Watch directly on YouTube
Complete workflow

Track a custom commission end to end

Outcome: move a fictional commission from enquiry and design through approval, production, quality checks and delivery.

Watch directly on YouTube
Scheduling

Schedule consultations safely

Outcome: connect a consultation to the right client and commission, assign responsibility and use reminders without over-notifying clients.

Watch directly on YouTube
Client handoff

Share designs and collect approvals

Outcome: attach a fictional design, request a decision and keep approval or revision feedback with the commission.

Watch directly on YouTube
Reporting

Read the dashboard and analytics

Outcome: identify what needs attention, confirm the underlying records and use reporting filters without treating estimates as accounts.

Watch directly on YouTube
Shopify integration

Connect Shopify safely

Already installed? Do not register again. Open Shopify Admin, go to Apps, then open Jewelry Studio Manager. Learn the permissions and sync boundaries before connecting.

Watch directly on YouTube
Roles and privacy

Roles, privacy and client data

Review team access, privacy responsibilities, client portal data and safe account practices.

Watch directly on YouTube
Troubleshooting

Fix five common studio mistakes

Prevent duplicate clients, disconnected commissions, inaccurate stages, noisy alerts and unsafe shared access.

Watch directly on YouTube
Bespoke workflow

Follow a bespoke engagement-ring commission

See an end-to-end fictional commission and adapt the stages to your studio's documented process.

Watch directly on YouTube
1

Install & Setup

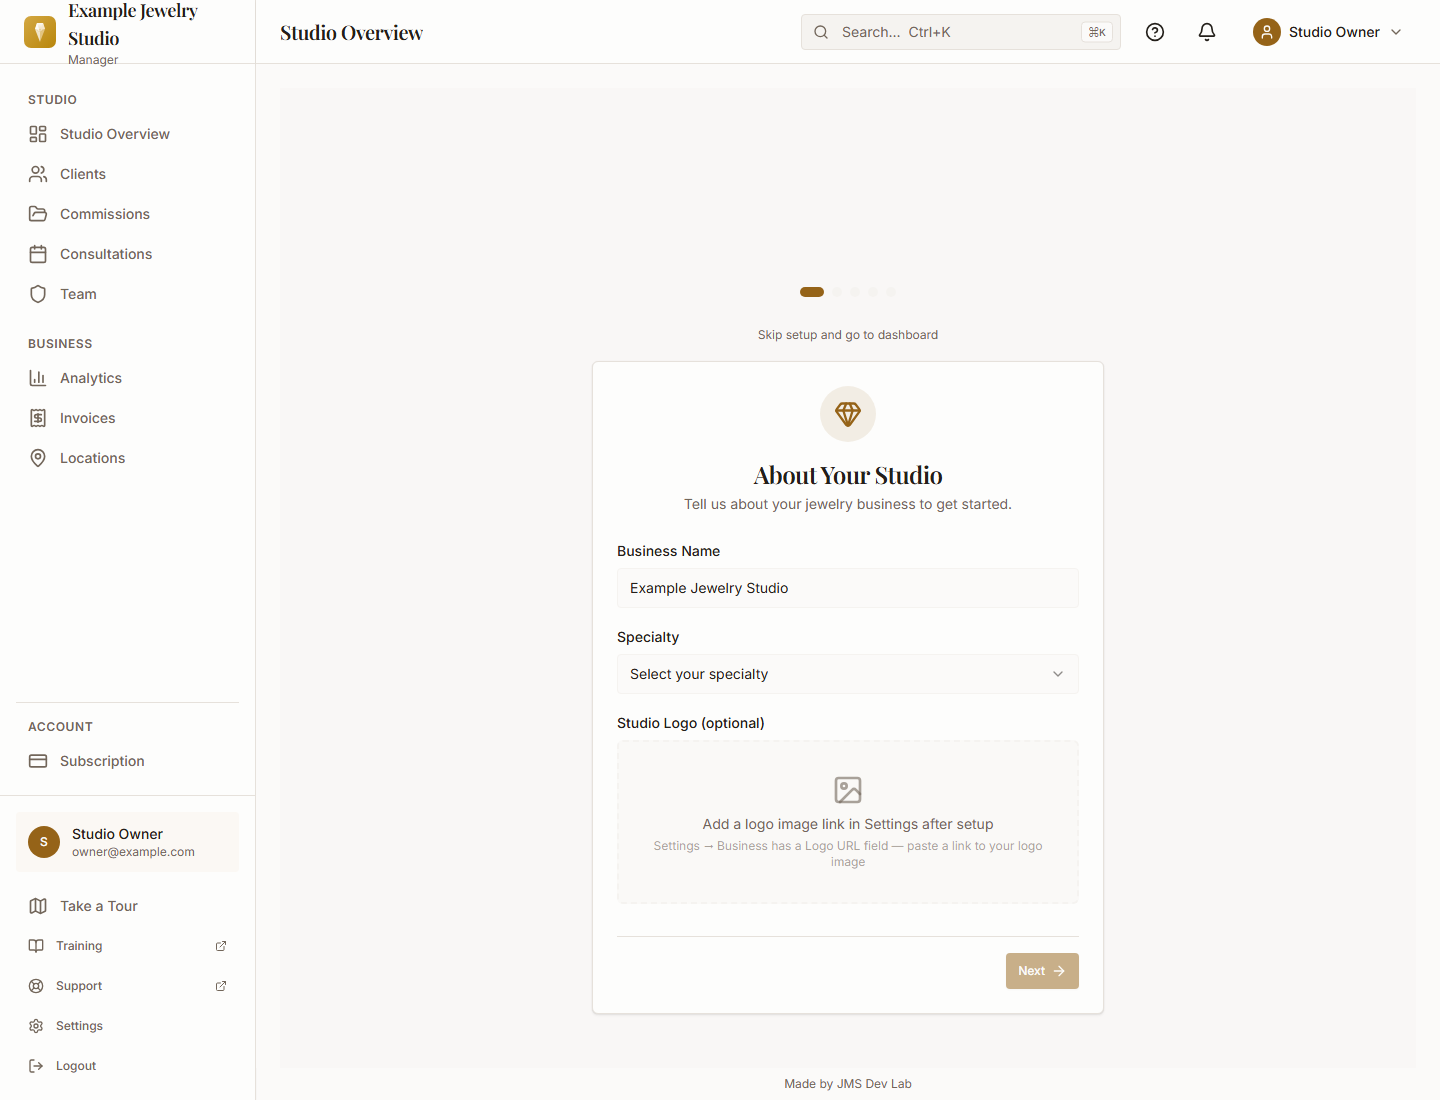
New to the web app? Create an account and complete the guided setup wizard. Already installed through Shopify? Open Shopify Admin > Apps > Jewelry Studio Manager; do not register again.
  • Create your account and start the guided setup
  • Authorize Shopify only if you want to connect your store
  • Complete the 5-step setup wizard: describe your studio, confirm location and currency, rename the existing commission stages, optionally invite a first client, and review the next steps
  • Your 14-day free trial starts immediately — no credit card required
Current setup wizard: studio name and specialty
2

Dashboard Overview

Your dashboard gives you an at-a-glance view of everything happening in your studio. See what needs attention right away.
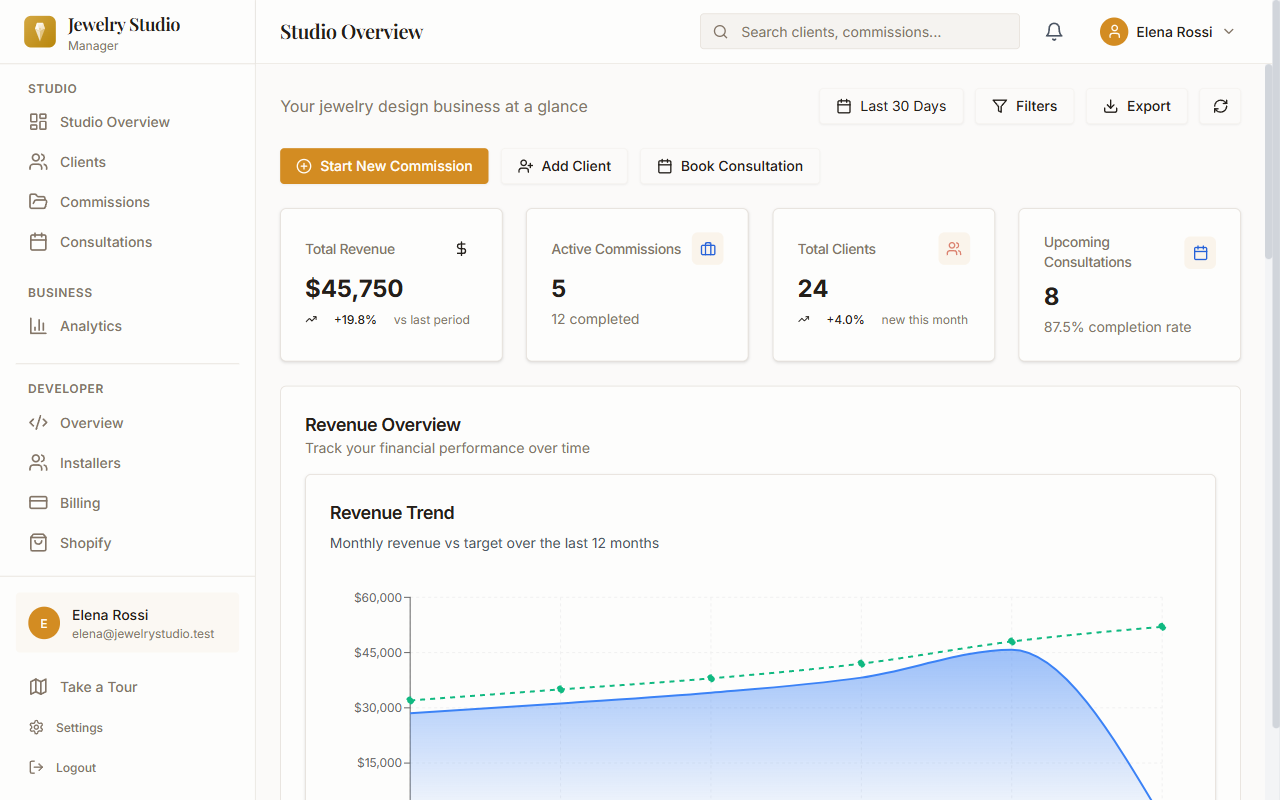
  • KPI cards show total revenue, active commissions, total clients and upcoming consultations; the revenue chart and performance summary come with the Professional and Enterprise plans
  • Quick action buttons let you create a new commission, add a client, or schedule a consultation with one click
  • A summary of recent activity keeps you informed about status changes, new inquiries, and upcoming deadlines
Dashboard with KPI cards, quick action buttons, and revenue chart
3

Managing Clients

Build detailed client profiles that capture everything you need to deliver a personalized jewelry experience.
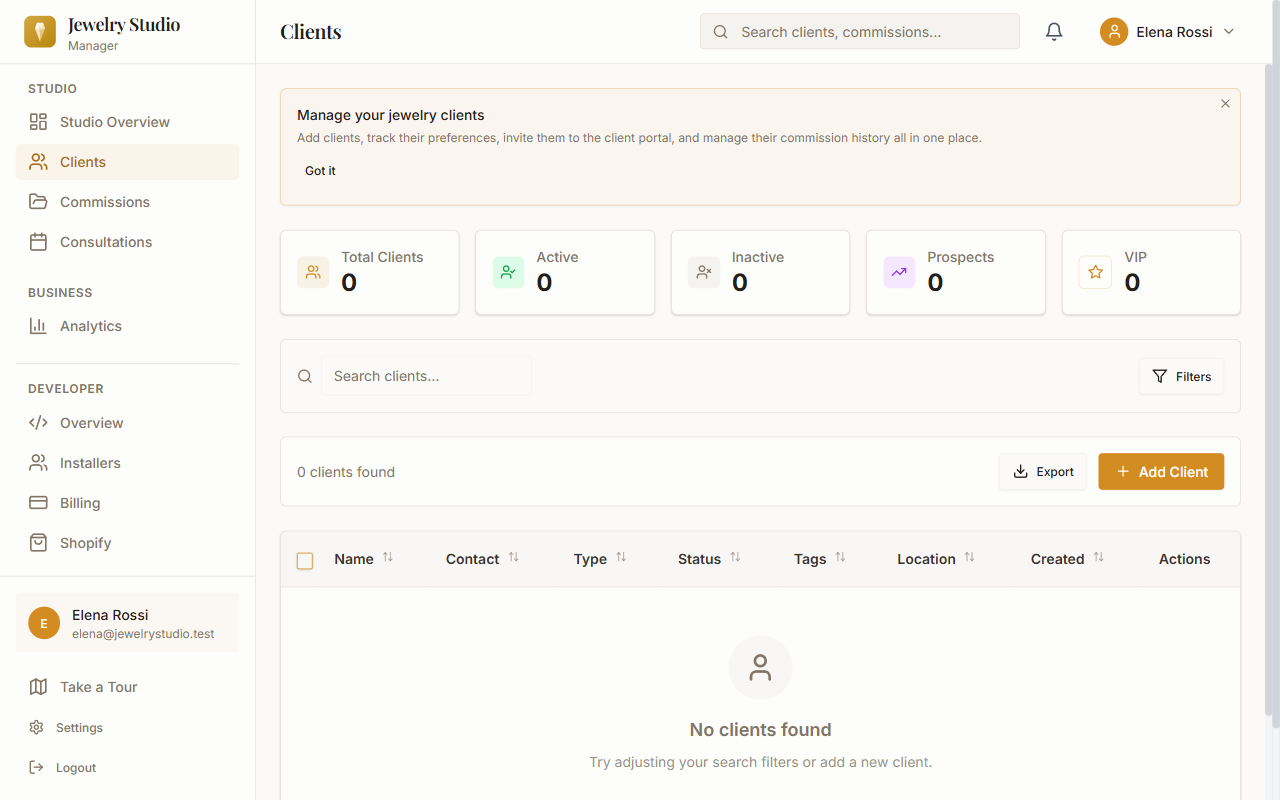
  • Add clients manually, import a CSV from the Clients page, or sync from Shopify to bring in your existing customers
  • Store jewelry-specific details: ring sizes, preferred metals, gemstone preferences, style notes, and budget ranges
  • Use the Design Preferences tab to record inspiration images, style direction, and material choices for each client
  • View a complete history of commissions, consultations and notes on every client profile
Client list view with stats, search, and filters
4

Creating Commissions

Track every custom piece from first inquiry through final delivery with the commission workflow built for jewelers.
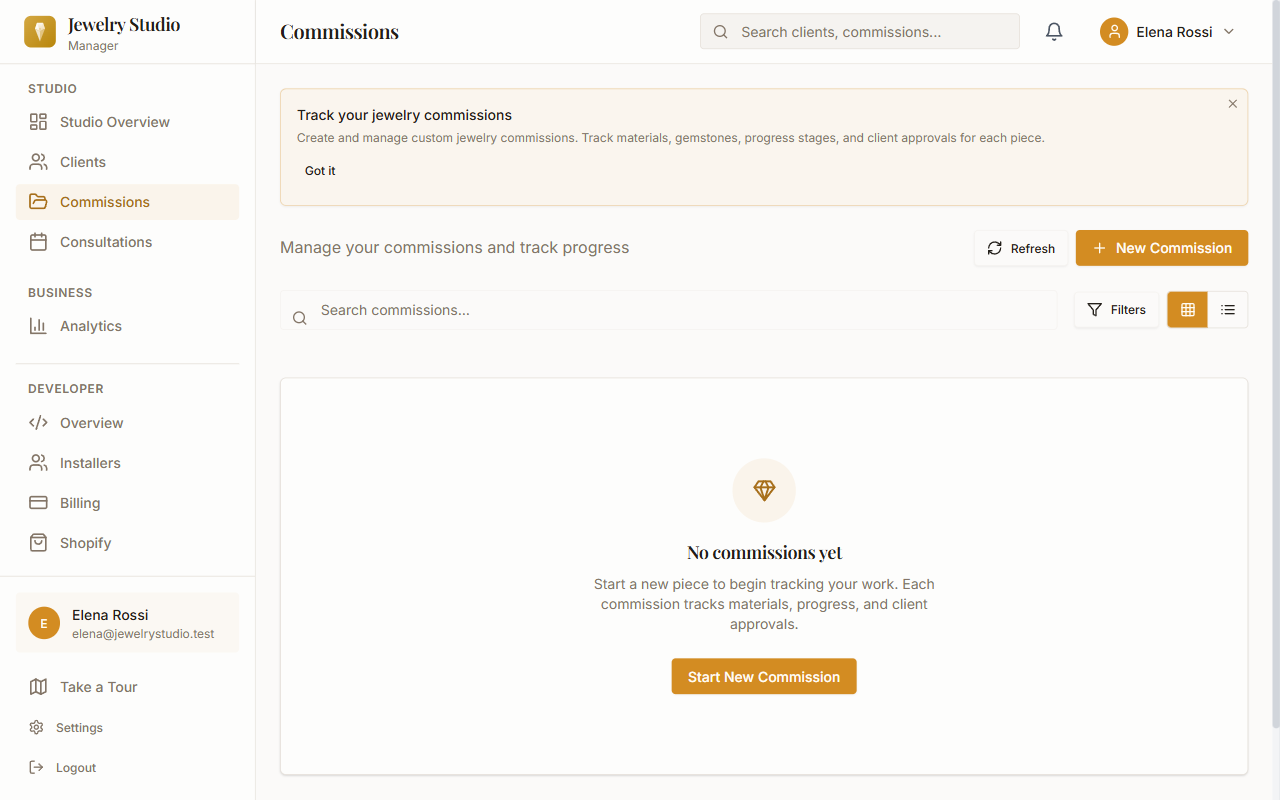
  • Use the 4-step commission wizard: select a client, enter project details, set budget and timeline, then review before creating the commission
  • Commissions move through jewelry-specific workflow stages: Inquiry → Consultation → Design → Revision → Approval → Production → Quality Check → Delivery → Completed. You can rename the stages to match your studio
  • Attach design files, reference photos, and notes at each stage
  • Clients who have a portal account (Professional and Enterprise plans) get an email when their commission moves to a new stage, unless they have turned emails off
Commissions page with tracking and new commission button
5

Scheduling Consultations

Keep your studio calendar organized with built-in consultation scheduling that keeps both you and your clients on track.
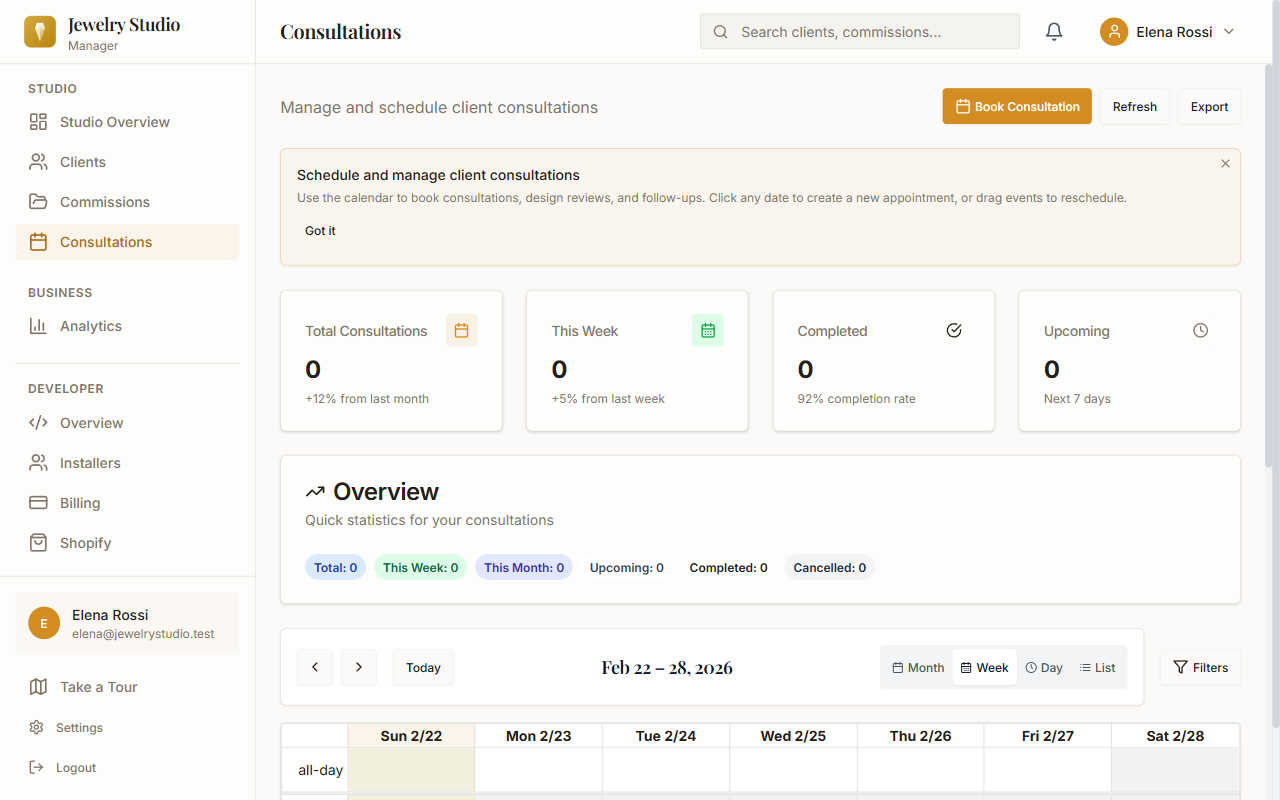
  • View your schedule in a built-in calendar view with day, week, and month layouts
  • Book consultations by type (consultation, design review, client meeting, site visit or follow-up) with a time, location or video link, and notes
  • Automatic email reminders are sent to clients before their consultation so they never miss a visit
  • Clients with a portal account can review upcoming consultations, cancel, or choose a new time through the client portal
Calendar view with consultation scheduling and stats
6

Client Portal

Give your clients a professional space to stay connected with their commission and your studio. The client portal is included in the Professional and Enterprise plans.
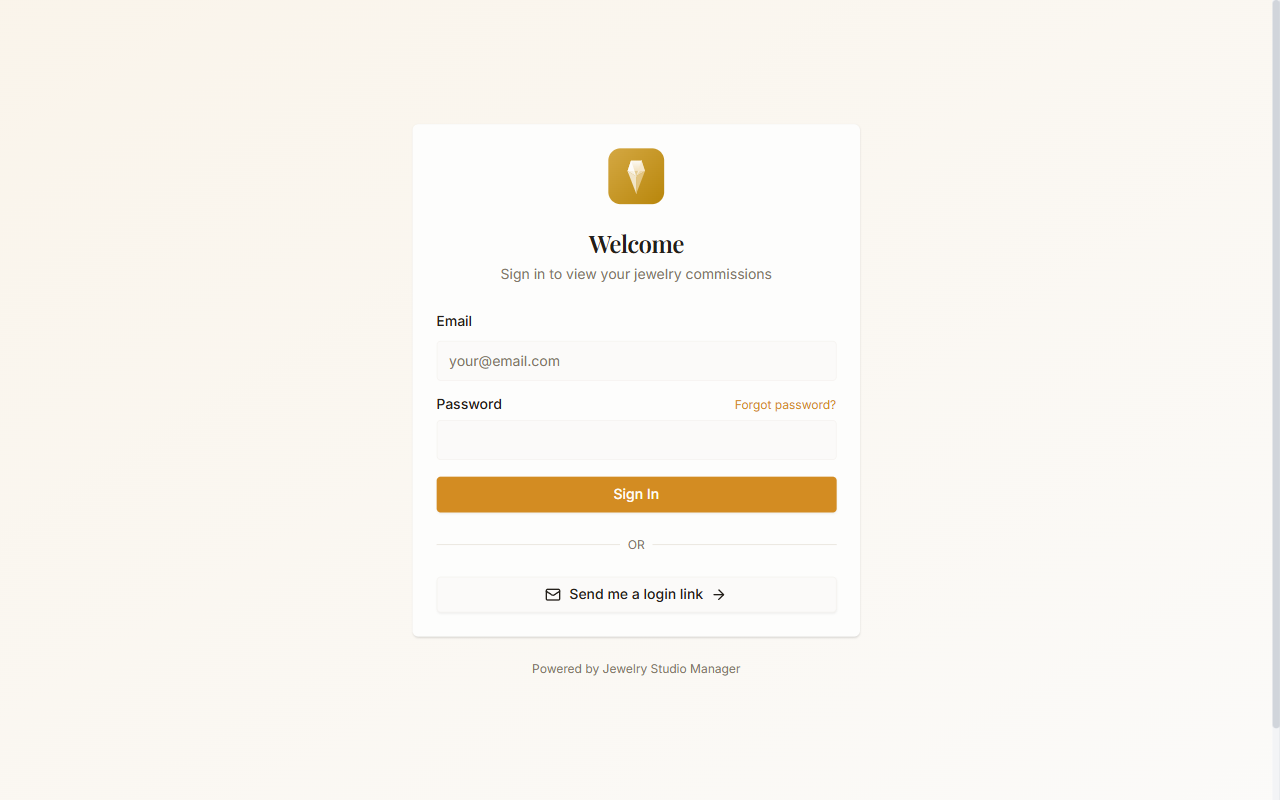
  • Open a client's profile and choose Invite to Portal — they receive an email from your studio with a link to set their password. You can resend the invitation from the same place
  • Clients can view real-time commission progress, see which stage their piece is in, and review timeline updates
  • The design approval workflow lets clients approve or request revisions directly through the portal; you can require a typed-name signature for sign-off
  • Clients can also review or reschedule consultations, submit feedback, and view the documents you share with them from one place
  • Portal emails carry your studio name; full white-label branding is part of the Enterprise plan
Client portal login page with branded design
7

Analytics

Understand your business performance with clear, actionable reports designed for jewelry studios.
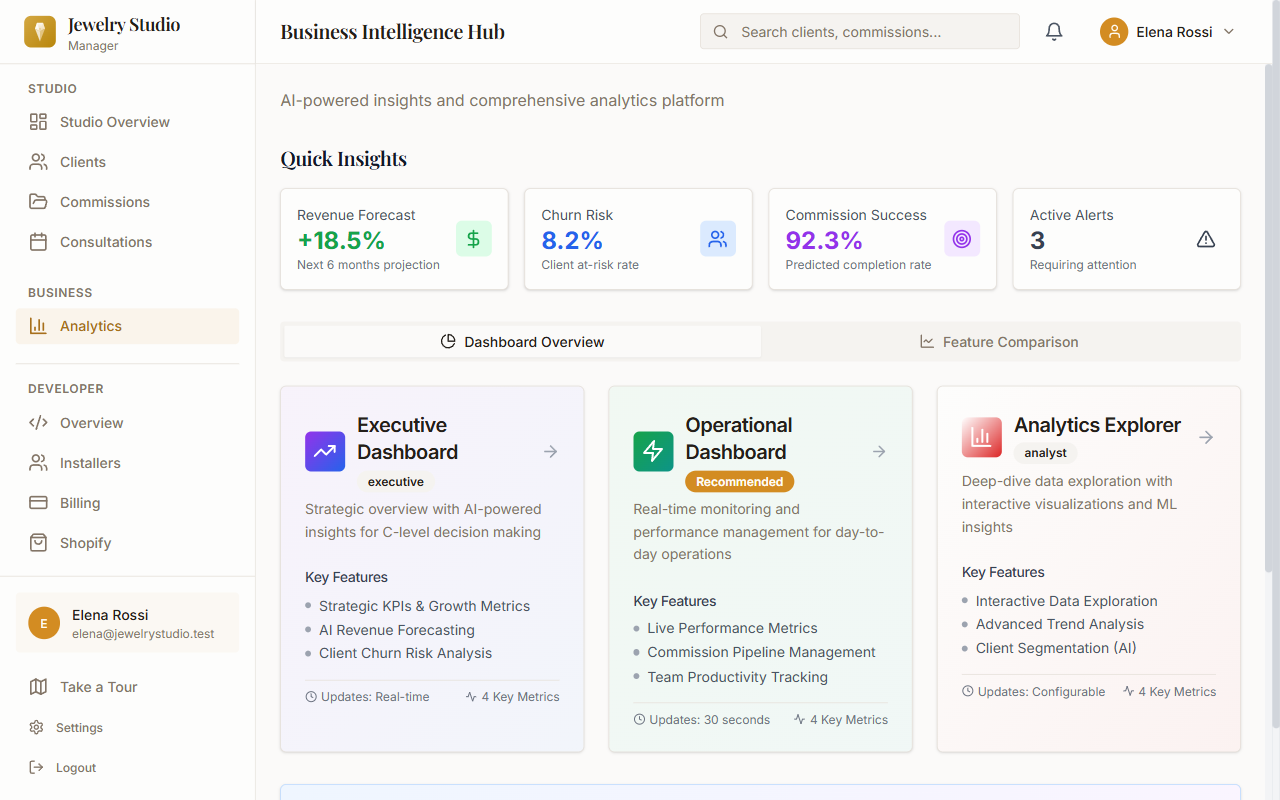
  • Revenue tracking shows monthly and yearly earnings, average commission value, and trends over time
  • Customer insights reveal your most active clients, popular services, and conversion rates from inquiry to completed commission
  • Visual charts and summaries make it easy to spot opportunities for growth
Analytics dashboard with revenue forecast, churn risk, and dashboard options
8

Shopify Integration

Connect your Shopify store to import customers and orders into Jewelry Studio Manager, add the service products you create here to your store, and turn a finished commission into a Shopify draft order.

Already installed? Do not register again. Open Shopify Admin, go to Apps, then open Jewelry Studio Manager.
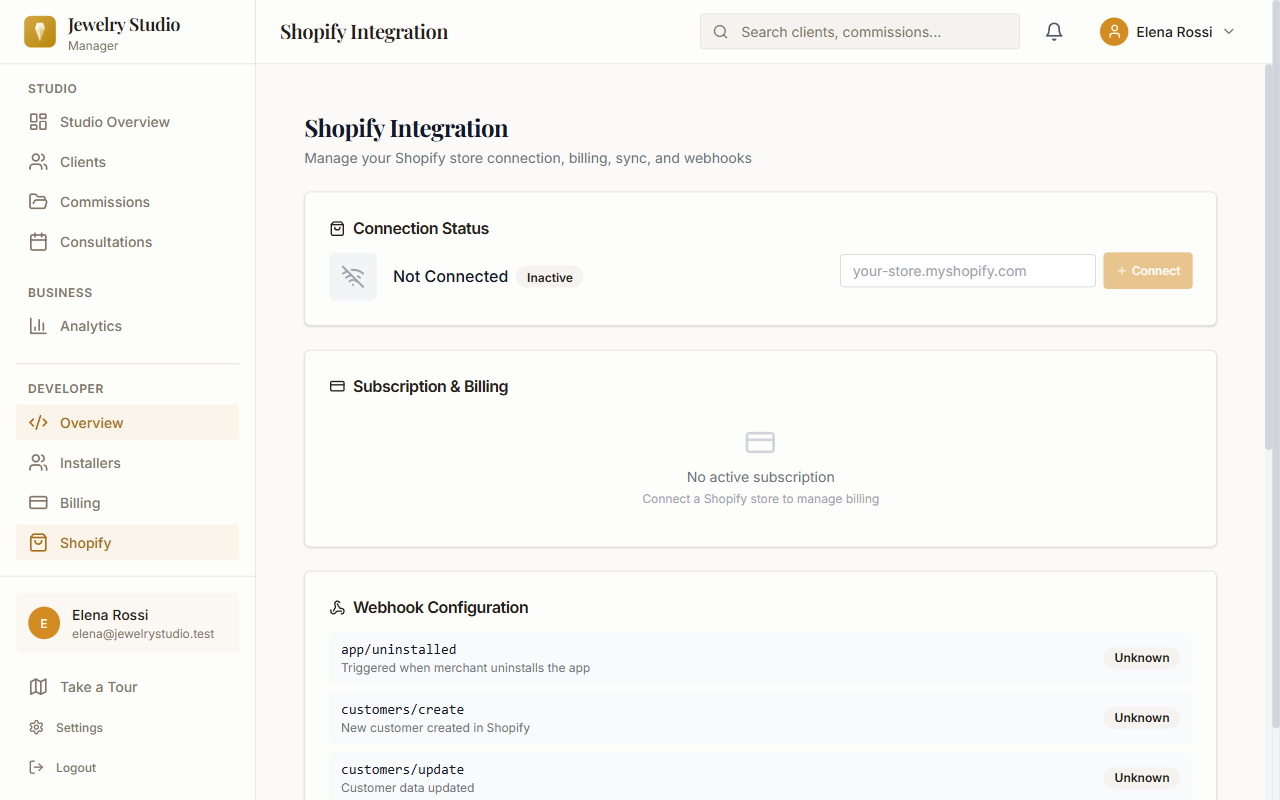
  • Install or launch Jewelry Studio Manager from your Shopify Admin; Shopify authorization is completed during the installation flow
  • The app's home page in Shopify Admin walks you through setup: choose a plan, press Sync All to import your existing customers, open the studio, and invite your first client
  • After that, new customers and orders arrive automatically through Shopify webhooks, and each new order creates a commission for you to take forward
  • From a commission, Create Shopify draft order prepares an order your client pays through your own store checkout
  • Add the Client Portal button to your store: in Shopify Admin go to Online Store → Themes → Customize, choose Add block → Apps → Client Portal, then edit the heading, description, button text and helper text. The button opens your clients' secure sign-in page
The app home page in Shopify Admin with the setup checklist and sync status
9

Team & Roles

Bring your designers and bench jewellers into the same workspace, each with the access their job needs.

  • Open Team in the sidebar and choose Invite Member. Enter their name, email and role: Designer, Staff / Bench Jeweller, Manager or Admin
  • They receive an email to set a password and join your studio. Owners and Admins can change a member's role later from the same page
  • Seats by plan: Starter includes 2 people, Professional up to 10, Enterprise unlimited
  • Only Owners, Admins and Managers see billing, exports and studio settings
10

Files, Documents & Approvals

Keep every sketch, CAD render and photo with the commission it belongs to, and decide exactly what your client sees.
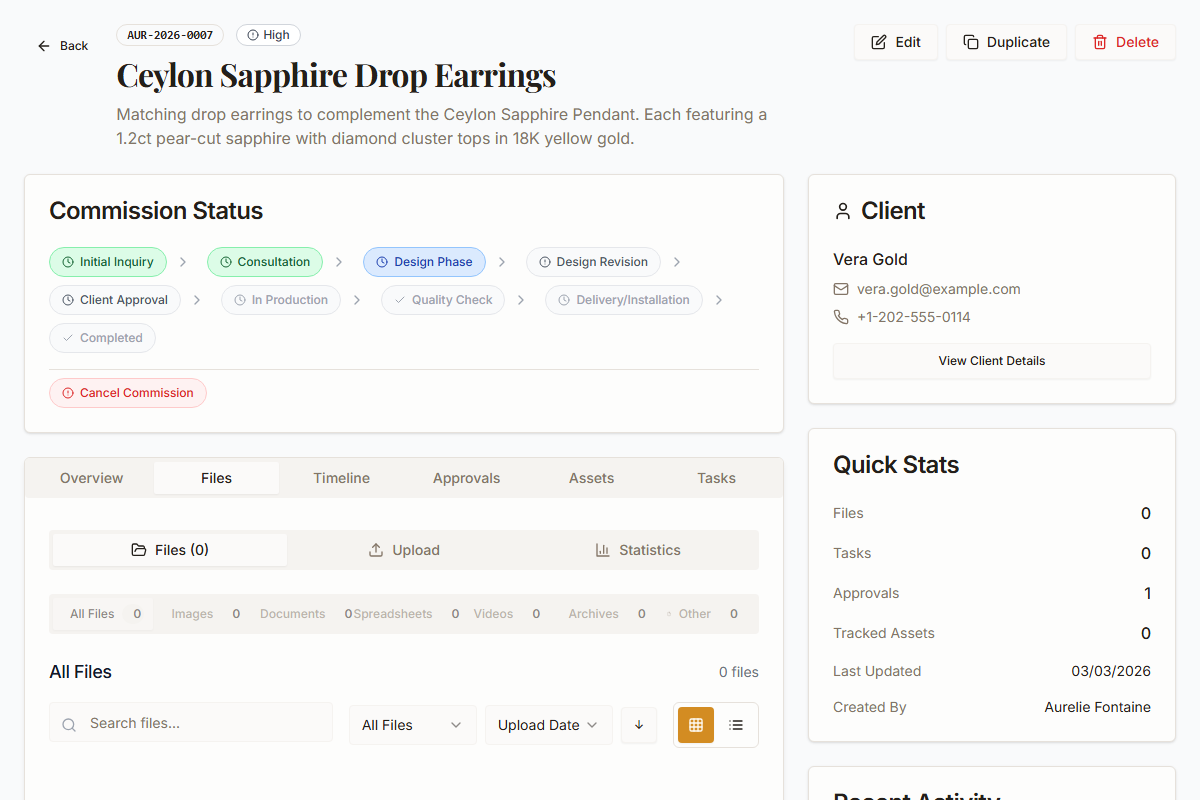
  • Upload files on a commission's Files tab. Files stay private to your studio until you choose Share with client; shared files appear in the client's portal under Documents
  • On the commission's Approvals tab, request a decision with images and instructions. Tick Require the client's signature when a stage needs a formal sign-off; the client then types their full name to approve
  • The client approves or asks for changes from the portal, and every decision is kept with the commission
  • Approvals and shared documents need the client portal (Professional and Enterprise plans)
Commission files with share-with-client controls
11

Client Emails & Workflow

Make the messages your clients receive sound like your studio, and name the stages the way you work.

  • Open Settings → Emails to edit the six client emails: portal welcome, approval request, stage update, commission complete, consultation reminder and feedback request
  • Insert details such as the client's name or commission title with the variable chips, check the live preview, and reset any email to the default at any time
  • In Settings → Business, rename your workflow stages; the order of the stages stays the same so reports and reminders keep working
12

API Keys & Webhooks

Connect your own tools to Jewelry Studio Manager. Available on the Enterprise plan to studio Owners and Admins.

  • Open Settings → Platforms and create an API key. Keys give read-only access to this studio's clients, commissions and consultations; the secret is shown once, and revoking a key stops access immediately
  • Register an outgoing webhook to a public HTTPS address and choose the events you want. Payloads contain a record ID, not client details
  • Verify each delivery with the HMAC-SHA256 signature in the X-JSM-Signature header and de-duplicate with X-JSM-Event-Id. Delivery is best-effort without retries, so reconcile with the read API
13

Plans, Billing & Your Data

What each plan includes, where to change it, and how to take your records with you.

  • Paid plans — Starter, Professional and Enterprise — are subscribed through the Shopify App Store and billed by Shopify, each with a 14-day free trial. Change or cancel from the app's plan page in Shopify Admin
  • Studios that already subscribe through our web billing keep managing that subscription from Billing in the app. A studio without a paid plan keeps working with limited access
  • Export your clients from the Clients page (CSV, JSON or Excel). Owners, Admins and Managers on Professional and Enterprise can also export commissions, consultations and dashboard reports from Analytics
  • For a full account export, closure or erasure request, email support@jewelrystudiomanager.com before uninstalling or closing the account
14

Invoices & Orders

Bill clients from their commissions, see what each client owes, what has been paid and what is overdue, and give clients a clear document to keep. Invoices are available on every paid plan and remain available to standalone studios after a trial ends with limited access.

  • To bill a client, open the commission and click Create invoice in its Invoices card, or click New invoice on the Invoices page and pick the commission from the search list
  • The client is taken from the commission, and the first line is filled in with the commission’s title, description and quoted price. Edit it, add lines for materials, labour or engraving, and set a quantity and unit price for each; the subtotal, tax and total update as you type
  • The tax rate starts at your studio’s rate from Settings → Business and can be changed for that invoice. You can also add a due date and notes, which are printed on the invoice
  • Choose Invoice to request payment, or Quote for an estimate that is not yet payable. When you click Create invoice, the printable invoice opens straight away, and the commission’s Invoices card lists every invoice raised for it
  • Open Invoices in the sidebar. The cards at the top total your orders, their value, what has been paid and what is outstanding, and Aging Receivables groups unpaid balances into current, 1–30, 31–60, 61–90 and 90+ days
  • Click an order to see its line items, subtotal, tax, any discount and the total. Download PDF saves a PDF copy, and View Invoice opens a printable page with Print / Save PDF
  • Email Invoice opens your own email app with a short message to the client; attach the downloaded PDF before you send it
  • The document is titled Quote while an order is a draft or pending (including one created as a Quote), Receipt once it is paid in full, and Invoice otherwise
  • Your business name, address, contact details, tax ID, logo, currency and tax label come from Settings → Business, which Owners, Admins and Managers can edit
15

Locations

Keep each workshop or showroom's address and contact details in one place. Adding and editing locations is part of the Enterprise plan, for studio Owners, Admins and Managers.

  • Open Locations in the sidebar and choose Add Location. Give it a name, and optionally a phone number, street address, city, state and country, then choose Create Location
  • Use the edit button on a location's card to change its details, including a contact email, or the delete button to remove it. Deleting a location cannot be undone
  • Everyone in the studio can view the Locations page. On other plans, Owners and Admins see Upgrade for Multi-Location instead of Add Location
16

Resetting Your Password

Forgotten your password, or think someone else knows it? Set a new one from the sign-in page. Available on every plan.

  • On the sign-in page choose Forgot your password?, enter your email address and choose Send Reset Link. To protect your privacy, the page gives the same answer whether or not the address has an account
  • The email, titled Password Reset Request, has a Reset Password button. The link works once and expires after 1 hour; requesting another link replaces the previous one
  • Your new password needs at least 8 characters, including an uppercase letter, a lowercase letter, a number and one of these symbols: @ $ ! % * ? &
  • Resetting ends all of your existing sign-ins, so any other device you were signed in on has to sign in again with the new password
  • Team members who were invited but have not set a password yet should use the link in their invitation email. Clients use Forgot password? on the client portal sign-in page
17

When Your Trial Ends

Every paid plan starts with a 14-day free trial. Here is what happens when it finishes.

  • A web sign-up starts the trial on the plan you picked on the pricing page, or on Starter if you did not pick one, with no card needed.
  • In the last week of a web trial, a banner in the app reminds you, with a further warning the day before and on the final day
  • If the trial ends without a paid plan, the studio keeps working with limited access: 1 user, 50 clients and 3 active commissions. Nothing is deleted and you are not locked out. Anything already above those limits stays, but you cannot add more, and paid features such as the client portal and analytics switch off until you move to a paid plan
  • Paid plans are subscribed through the Shopify App Store; see Plans, Billing & Your Data
  • Installed through Shopify? Choose a plan from the app's plan page in Shopify Admin before the trial ends. If the trial ends first, you can still open and view your records, but adding or changing anything waits until you choose a plan there

Ready to Get Started?

Create your Jewelry Studio Manager account and follow these steps to organize your studio today.

Start Free Trial